It made me remember just how awesome and exciting Australian music was in the 1990s, and how much of my time I used to spend in the cosy, cave-live interior of the Au Go Go shop - Snout, Sandpit, You Am I, Jebediah, Tomorrow People, Tumbleweed, Bodyjar, Regurgitator, Drop City, Dreamkillers, Spiderbait, Powderfinger, Pollyanna, Screamfeeder, Augie March, Something For Kate, Non Intentional Lifeform, Effigy, Even, Grinspoon, The Mavises, Ammonia, Not From There, Front End Loader, The Fauves, Voodoo Lovecats, Magic Dirt.... it was such a time.
Wednesday, July 30, 2008
Australian music in the 90s
Last night, my Beloved's iPod shuffle function dredged up a song I used to love about ten years ago, but had since wiped from my mind entirely - Greater Expectations by Sandpit. Such a great song, wistful yet upbeat. I immediately went into a nostalgic reverie, jumping up and down and squealing.
Thursday, July 10, 2008
So very sad
This Sweet Juniper post is so sad, I could just about cry. I can just imagine the organiser afterwards, tears welling up as they pack up the paper plates. *Sniff*
More smugly healthful cookies
In my ongoing quest for cakie-things I can eat with reckless, guiltless abandon, here are some fruity goodies I just whipped up. They taste good straight out of the oven - surprisingly so, given that they are essentially baked porridge - and go nicely with chai.
(Recipe from here)
4 very ripe bananas
2 cups instant oats
1 cup raisins or chopped dates
1 large or 2 small peeled, diced apples
1/3 cup canola oil
1 teaspoon vanilla essence
1 heaped teaspoon cinnamon
1 tsp baking powder (my addition - not sure if it made a difference)
Preheat oven to 180C/350F.
Mash bananas to a pulpy mess. Add everything else. Stir and leave to sit for 15 minutes. Spoon teaspoons-full onto a silicon baking mat or tray with baking paper. Make them nice and shapely. Bake for 20 minutes.
Makes about 36.
Monday, July 7, 2008
Cookies for noble healthy people
I like eating chocolate. Sometimes, however, I ponder the amount of chocolate I eat, and then I start trying not to eat chocolate per se, but chocolate-flavoured-things-that-are-less-good-but-healthier.
My latest recipe has been chocolate cookies, with no added fats/oils, no added animal products (i.e. vegan) and minimal sugar. Not to mention being high-fibre. And high-protein. They sound pretty boring, and in comparison to chocolate, they are. However, for nibbling something with a hot beverage - say, a hot chocolate - they work well.
I got the recipe from http://blog.fatfreevegan.com/2007/02/valentines-treat-chocolate-cookies-two.html.
She, in turn, modified them from somewhere else.
I added pecans for texture. (Actually, I added walnuts, but I wish I'd added pecans. The walnuts I used had bits of shell in the packet, which added some trepidation to the cookie-chewing experience.) I also replaced 1/4 of the flour with high-protein soy powder, simply because I have some in my pantry and wanted to see what would happen. Likewise, I replaced the sugar with agave syrup - I once bought some because it's in lots of recipes from American vegan cook books. It worked okay. It's made out of the same cactus plant as tequila.
I should add that straight out of the oven, they aren't at their best. You know how fat is a flavour carrier, in a way that plain-flour-and water-dough isn't? They start out quite doughy and chewy. When they are cool, pop them into an airtight container, and over the next day or two, the doughiness gives way to a cakier, chewier texture and the flavour comes out.
INGREDIENTS
1 cup flour (I replaced some with protein powder)
3/4 tsp baking powder
1 tsp cinnamon
Pinch salt
1/2 cup cocoa
2/3 cup brown sugar (or other sweetener)
1/2 cup prunes, pureed in a bit of hot water
1/3 cup soy yoghurt (I used vanilla flavour, it being the only flavour stocked at my supermarket. It works out to be about half an individual container)
1 tsp vanilla
2/3 cup pecans
Magic ingredient - 1 tablespoon balsamic vinegar
Heat oven to 180C/350F. Mix together wet stuff, add dry. Make teaspoon-sized splodges on a greased tray or silicon baking mat. Flatten with wet hands. Bake 10 - 15 minutes.
Vegetarian trophy wall


Running Hot and Cold quilt
I live in fear that someone will buy this before I can. Which is to say, that someone will buy it in the next two years.

Scood / Skood / Barf
A few days ago, I got a sudden, strong urge to own a beanie or hood-thing with attached scarf.
I had no idea where to start - what are these things called? After some googling, it emerged that they go by the charming "barf" (beanie-scarf) or scood/skood (hooded scarf).
I'd seen some cool ones at the Rose Street Artist's Market off Brunswick Street, but I couldn't spend the $50+ (although I'm sure the cost is more than justified). So I decided to make one.
It therefore took some courage on my part to dig out my Mum's old machine, cart it to my house, read the manual and get it functioning, without any external coaching.
Anyway, the end result was very gratifying! I may be a sewing convert yet!
I made a reversible scood with a Japanese-inspired print on one side, and some purple tracksuit type material on the reverse.
I'd tried to find a pattern on the 'net - not that I have any idea how to use a pattern - but I couldn't find one, so I traced the hood part of a tracksuit top onto newspaper (praise broadsheets! You couldn't make THIS with the Herald-Sun), then added a scarf. I then pinned that onto the two layers of fabric and cut it out. Then I sewed it on the reverse side, leaving a gap at the base of the back of the head to turn it inside out.
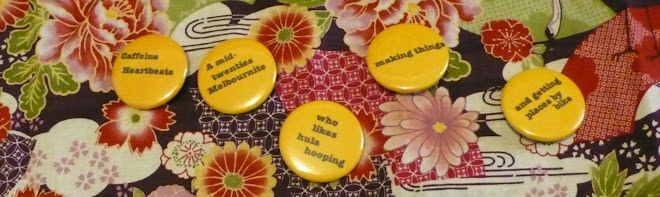
To jazz up the finished product, I cut out circles of the fabric and made badges with my trusty badge machine and pinned them on.
Ta da!


Subscribe to:
Posts (Atom)